目录
今天要实现一个下图的效果(常用在出行小程序中)
| 微信IOS小程序 | 微信Android小程序 | 支付宝IOS小程序 | 支付宝Android小程序 |
|---|---|---|---|
 |  |  |  |
这个两层滚动的效果看似简单,但是由于小程序机制及兼容性问题,实现起来却到处是坑。
功能拆解
- 涉及两层滚动
外层(整个页面)滚动是下方卡片内容拉上去覆盖地图,可自动吸附;
当卡片吸附后开启内层滚动(卡片中的内容滚动)
- 具体规则
如果上拉,先触发外层滚动,自动吸顶;接着上拉,触发内层滚动。
如果下拉,先滚动内层,内层ScrollView的scrollTop=0时,接着下拉触发外层滚动,自动吸附。
- 导航头特效
| 卡片未吸附时 | 卡片吸附后 | 卡片中内容往上滚动一段距离 |
|---|---|---|
 |  |  |
- 其他要求
- 第二层滚动卡片的高度是动态的,可能不足70vh,可能刚好100vh多一点(有滚动),也可能很长很长(远超过100vh)
- 卡片的内容是定时更新的,可能每隔3s或5s,更新后卡片内容的高度可能发生变化
- 初始化可能卡片吸附可能不吸附,业务逻辑(订单类型)决定
小程序实现的难点
-
对于h5来说,可以通过
preventDefault()、stopPropagation()在滚动过程中控制是否阻止默认事件和冒泡事件,再结合css的translate可以实现虚拟滚动、惯性滚动的效果(如IScroll.js)及长列表的优化(无限滚动)。但是对于小程序来说,如有双线程隔离,必须事先声明(是否阻止冒泡),而不是滚动过程中条件控制。 -
IOS粘性回弹效果,如果在回弹效果是进行手势操作,会有事件击穿的效果
具体来说情况是这样的
当卡片吸附后,卡片内容滚动接近滚动到底,
此时来一个快速回马枪(快速上拉, 待回弹没有消失,快速下拉,这时会触发外层滚动)
用户就看到一个尴尬的页面状态。
-
微信小程序的
<ScrollView>组件,要避开<ScrollView>的重新渲染,因为这样会导致滚动的位置会丢失(scrollTop=0). -
支付宝小程序不支持catchMove(阻止事件冒泡)也就是对里面
<ScrollView>进行上拉或下拉操作,外面一层(页面)也会触发滚动。 -
由于小程序双线程机制,要控制
setData的频次,否者在拖动过程中会看到页面抖动很厉害!
为什么不用<movable-view>、<movable-area>?
之前团队有人用<movable-view>、<movable-area>实现过,但是有一些难以修复的bug及其他体验问题
-
卡片吸顶后,下拉漏出地图,这个没有跟手势的效果,是因为
<movable-view>、<movable-area>没这个能力,通过一个hack方案判断首饰方向实现的 -
卡片吸顶后,下拉,地图拉不出来,这个是小程序双线程问题,记录的
scrollTop有误差,即使用上upperThreshold、onScrollToUpper缓解,当内容过长且快速滚动,可以说仍旧必现! -
由于卡片高度动态变化,
<movable-view>、<movable-area>要进行适配,加上小程序双线程机制,查询卡片高度很耗性能。 -
支付宝小程序不支持
catchMove,使得在同一个组件实现这个效果使得逻辑混乱(逻辑难以解耦) -
老得组件夹杂其他功能--配置多段吸附。
由于以上上述原因不止是代码量巨大(单js就800行左右),加上有一些页面在用, 使得该组件难以修复bug,难以维护。因此我重新写了一个组件。
实现思路
简单说一下思路
-
外层滚动我其实是利用小程序页面滚动,地图和卡片内容是绝对定位,监听手势自动吸附。
-
卡片吸附后开启内层滚动,在内层滚动的过程中微信通过
catchMove控制不触发外层滚动,而支付宝是通过hack的方式实现(状态判断) -
前面讲过由于小程序双线程机制,导致
scrollTop记录不准确,未避免地图拉不出来的情况,通过判断用户下拉的距离大于scrollTop,就将scollTop置为0,且拉出地图 -
是否吸附、卡片
scrollTop在组件(TwoScroll)自身维护(是否吸附的初始状态由业务层告知,组件取默认值),通过事件通知业务层,业务层维护导航头状态。 -
组件支持配置卡片左上方Icon和右上方Icon,地图高度是业务层控制实现
核心思路是这样。
代码实现
- 页面配置
scroll.config.ts
tsexport default definePageConfig({
  navigationBarTitleText: '',
  navigationStyle : 'custom',
  transparentTitle: 'always'
})
- 页面代码
scroll.tsx
tsximport { View } from "@tarojs/components";
import MyNav from '../../components/MyNav';
import { useEffect, useState } from "react";
import './index.scss'
import TwoScroll from "../../components/TwoScroll";
import Taro from "@tarojs/taro";
let _showTitle = false;
let _lintType: 'top' | 'middle' = 'middle';
const MyPage = () => {
const [lintType, setLineType] = useState<'top' | 'middle'>(_lintType);
const [showTitle, setShowTitle] = useState(_showTitle);
useEffect(() => {
const event = Taro.eventCenter;
event.on('line-type', (type: 'top' | 'middle') => {
if(_lintType !== type) {
_lintType = type;
setLineType(type);
}
});
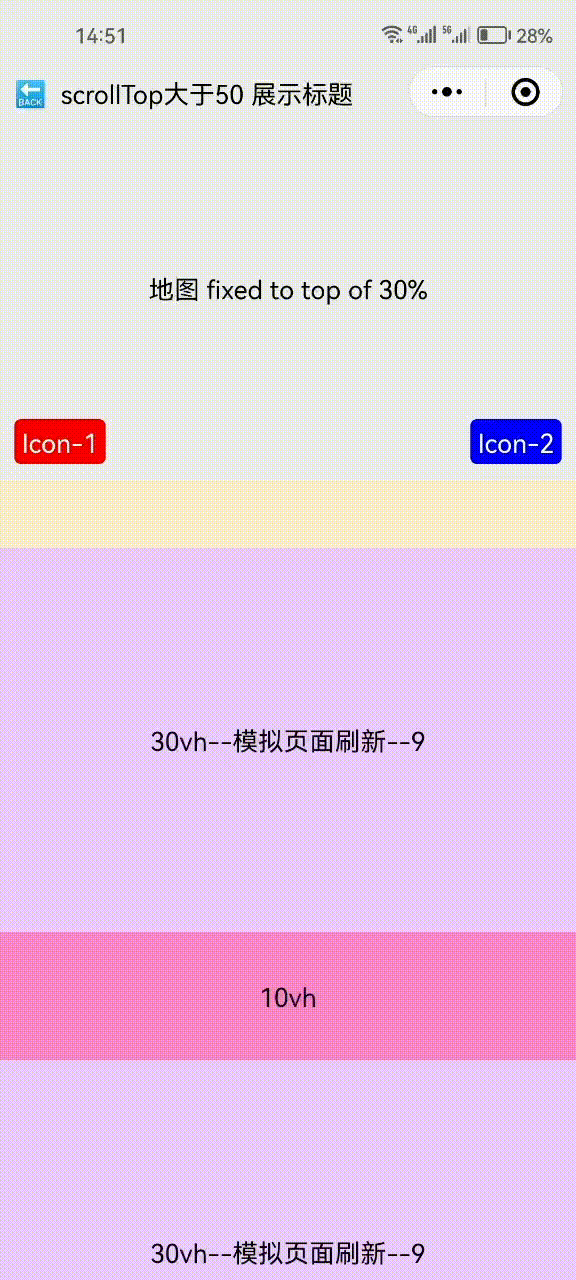
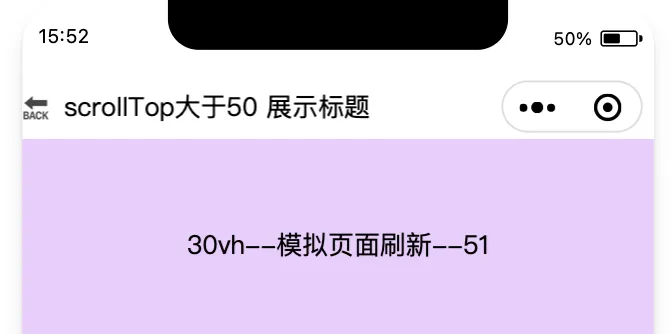
event.on('scroll-top', (scrollTop) => {
if(scrollTop > 50 && !_showTitle) {
_showTitle = true;
setShowTitle(true);
}
else if(_showTitle && scrollTop <= 50) {
_showTitle = false;
setShowTitle(false);
}
})
return () => {
event.off('line-type');
}
}, []);
const [time, setTime] = useState(new Date().getSeconds());
useEffect(() => {
const timer = setInterval(() => {
setTime(new Date().getSeconds());
}, 1000);
return () => {
clearInterval(timer);
}
}, []);
const backgroundColor = lintType !== 'top' ? 'transparent' : '#fff';
return <View className="p-scroll">
<MyNav style={{backgroundColor}} hideBackIcon={process.env.TARO_ENV === 'alipay'}>
{showTitle ? 'scrollTop大于50 展示标题' : ''}
</MyNav>
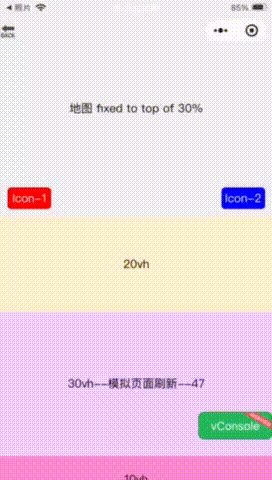
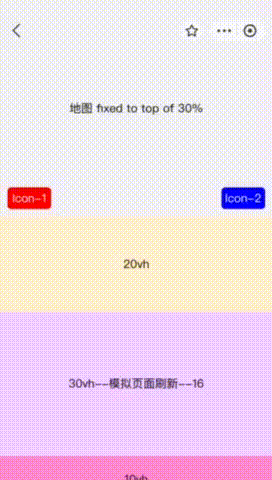
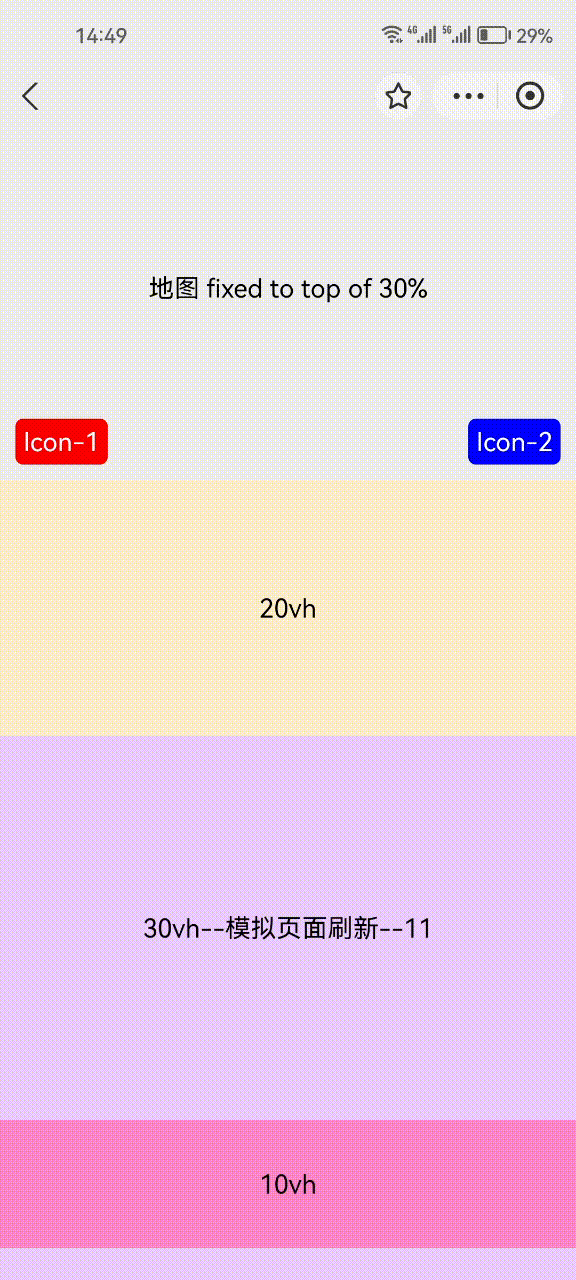
<View className="p-scroll__map">
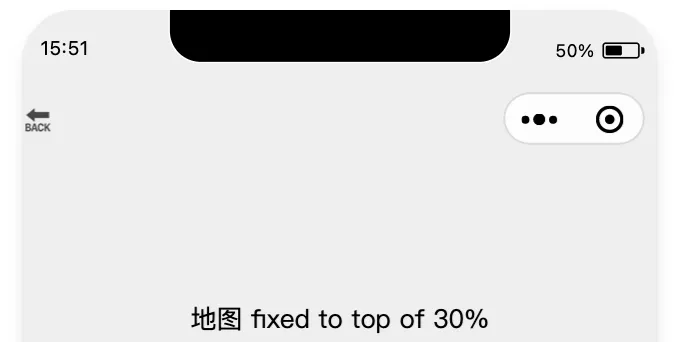
地图 fixed to top of 30%
</View>
<TwoScroll
leftNode={<View className="p-scroll__left">Icon-1</View>}
rightNode={<View className="p-scroll__right">Icon-2</View>}
top={300}
>
{ lintType === 'top'
? <MyNav className='p-scroll__nav-placeholder' hideBackIcon={process.env.TARO_ENV === 'alipay'}></MyNav>
: null
}
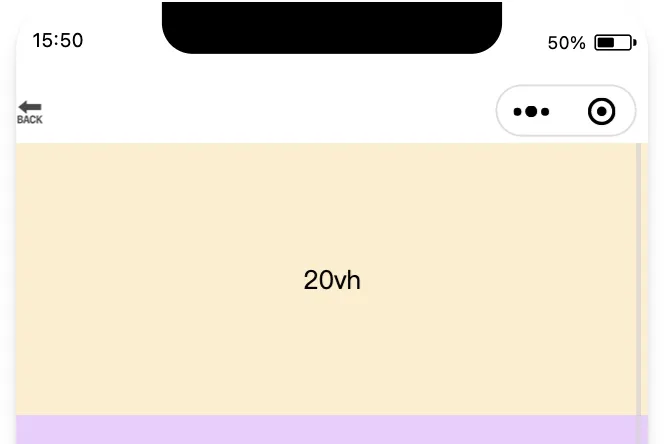
<View style={{lineHeight: '20vh', backgroundColor: '#fec', textAlign: 'center'}}>20vh</View>
<View style={{lineHeight: '30vh', backgroundColor: '#ecf', textAlign: 'center'}}>30vh--模拟页面刷新--{time}</View>
<View style={{lineHeight: '10vh', backgroundColor: '#f8c', textAlign: 'center'}}>10vh</View>
<View style={{lineHeight: '30vh', backgroundColor: '#ecf', textAlign: 'center'}}>30vh--模拟页面刷新--{time}</View>
<View style={{lineHeight: '20vh', backgroundColor: '#9ec', textAlign: 'center'}}>20vh</View>
<View style={{lineHeight: '20vh', backgroundColor: '#bac', textAlign: 'center'}}>20vh--模拟页面刷新--{time}</View>
<View style={{lineHeight: '30vh', backgroundColor: '#ecf', textAlign: 'center'}}>30vh</View>
<View style={{lineHeight: '20vh', backgroundColor: '#bda', textAlign: 'center'}}>20vh--模拟页面刷新--{time}</View>
<View style={{lineHeight: '10vh', backgroundColor: '#999', textAlign: 'center'}}>10vh</View>
</TwoScroll>
</View>
};
export default MyPage;
- 页面scss
index.scss
scss.p-scroll {
    &__map {
        position: fixed;
        top: 0;
        left: 0;
        width: 100%;
        height: 45vh;
        display: flex;
        align-items: center;
        justify-content: center;
        background-color: #eee;
    }
    &__left, &__right {
        position: absolute;
        top: -80rpx;
        height: 60rpx;
        width: 120rpx;
        background-color: transparent;
        color: white;
        display: inline-flex;
        align-items: center;
        justify-content: center;
        border-radius: 10rpx;
    }
    &__left {
        left: 20rpx;
        background-color: red;
    }
    &__right {
        right: 20rpx;
        background-color: blue;
    }
    &__nav-placeholder {
        position: static;
        background-color: transparent;
    }
    .my-nav {
        background-color: transparent;
    }
}
- 组件
TwoScroll.tsx
tsximport React from "react";
import Taro from "@tarojs/taro";

import { BaseEventOrig, BaseTouchEvent, ITouch, ScrollView, ScrollViewProps, View } from "@tarojs/components";

import './TwoScroll.scss';

const defaultTop = 300;
const touchStartPoint = {
    clientX: 0,
    clientY: 0
}

interface IProps {
    leftNode?: React.ReactNode;
    rightNode?: React.ReactNode;
    children?: React.ReactNode;
    top?: number;
}
class TwoScroll extends React.Component<IProps> {
    state: Readonly<{
        top: number
    }>;
    isOnBottom = false;
    scrollTop = 0;
    constructor(props: IProps){
        super(props);
        this.state = {
          top: this.props.top || defaultTop,
        }
    }

    touchStart = (e: BaseTouchEvent<ITouch>) => {
        const point = e.changedTouches[0];
        const {clientX, clientY} = point;
        console.log(clientX, clientY);
        Object.assign(touchStartPoint, {
            clientX,
            clientY
        });
    }

    touchEnd = (e: BaseTouchEvent<ITouch>) => {
        const point = e.changedTouches[0];
        const {clientX, clientY} = point;
        const diffX = clientX - touchStartPoint.clientX;
        const diffY = clientY - touchStartPoint.clientY;
        if(Math.abs(diffY) < Math.abs(diffX)) {
          console.log('水平滑动');
          return;
        }
        if(Math.abs(diffY) < 30) {
          console.log('没有触发阀值');
          return;
        }
        if(diffY < 0) {
          // 上拉
          if(this.state.top !== 0) {
            this.setState({
              top: 0,
            });
            Taro.eventCenter.trigger('line-type', 'top');
          }
          return;
        }
        // 下拉
        if(diffY > this.scrollTop) {
          this.setState({
            top: this.props.top || defaultTop,
          });
          Taro.eventCenter.trigger('line-type', 'middle');
        }
    }
    onScroll = (e: BaseEventOrig<ScrollViewProps.onScrollDetail>) => {
        this.scrollTop = e.detail.scrollTop;
        Taro.eventCenter.trigger('scroll-top', this.scrollTop);
    }

    /**
     * hack alipay
     * 以为支付宝小程序不支持catchMove,
     * 为了解决内部Scroll触发外层滚动。
     */
    onScrollToLower = () => {
      this.isOnBottom = true;
    }
    onScrollToUpper = () => {
      this.isOnBottom = false;
    }
    onScrollTouchEnd = (e: BaseTouchEvent<ITouch>) => {
      if(this.state.top === 0 && this.isOnBottom){
        e.stopPropagation();
      }
    }
    /* hack alipay end */

    render(): React.ReactNode {
        const { leftNode, rightNode, children } = this.props;
        const {top} = this.state;

        return <View className="two-scroll"
            style={{top: `${top}px`}}
            onTouchStart={this.touchStart}
            onTouchEnd={this.touchEnd}
            catchMove
        >
            {leftNode}
            {rightNode}
            {
              process.env.TARO_ENV === 'alipay' ? <ScrollView
              className="two-scroll__scroll"
              scrollY={top === 0}
              onScrollToLower={this.onScrollToLower}
              onScrollToUpper={this.onScrollToUpper}
              onTouchEnd={this.onScrollTouchEnd}
              onScroll={this.onScroll}
            >
              {children}
              </ScrollView> : <ScrollView
                className="two-scroll__scroll"
                onScroll={this.onScroll}
                scrollY={top === 0}
              >
                {children}
              </ScrollView>
            }
        </View>

    }
}

export default TwoScroll;
- 组件
TwoScroll.scss
scss.two-scroll {
    position: absolute;
    top: 0;
    left: 0;
    width: 100vw;
    height: 100vh;
    background-color: transparent;
    border-top-left-radius: 40rpx;
    border-top-right-radius: 40rpx;
    transition-timing-function: linear;
    transition-duration: 300ms;
    &__wrap {
      max-height: 100vh;
      width: 100vw;
    }
    &__scroll {
      max-height: 100vh;
      width: 100vw;
    }
}
其他辅助代码
MyNav.tsx
tsximport { View } from "@tarojs/components";
import Taro from "@tarojs/taro";
import './MyNav.scss'

const info = Taro.getSystemInfoSync();
const statusBarHeight = info.statusBarHeight || info.safeArea?.top || 40;
const menu = Taro.getMenuButtonBoundingClientRect();
const navConHeight = menu.height + 2 * (menu.top - statusBarHeight);

// const statusBarHeight = 47;
// const navConHeight = 40;

const MyNav = (props: {
  hideBackIcon?: boolean;
  children?: React.ReactNode;
  title?: string;
  className?: string;
  style?: React.CSSProperties;
}) => {
  return <View style={props.style} className={`my-nav ${props.className || ''}`}>
    <View className="my-nav__statusbar" style={{height: `${statusBarHeight}px`}} />
    <View className="my-nav__content" style={{height: `${navConHeight}px`, paddingLeft: process.env.TARO_ENV === 'alipay' ? '30px' : '0px'}}>
      {
        !props.hideBackIcon ? <View className="my-nav__icon">🔙</View> : null
      }
      {
      props.children ? props.children :
        props.title ? <View>{props.title}</View> :null
      }
    </View>
  </View>
}

export default MyNav;
MyNav.scss
scss.my-nav {
  position: fixed;
  top: 0;
  left: 0;
  z-index: 9;
  background-color: white;
  &__statusbar {
    width: 100vw;
  }
  &__content {
    width: 100vw;
    display: flex;
    align-items: center;
    padding: 0 20rpx;
  }
  &__icon {
    margin-right: 20rpx;
  }
}
最后还是的承认一下,新组件接入还是有一些成本的,但这个是特殊业务场景决定的。组件+demo 才200行,不只维护成本也大大降低,更是解决了老组件的难以解决bug。
本文作者:郭郭同学
本文链接:
版权声明:本博客所有文章除特别声明外,均采用 BY-NC-SA 许可协议。转载请注明出处!